How to Link SoundSwitch with the MCX8000 in Standalone Engine Mode
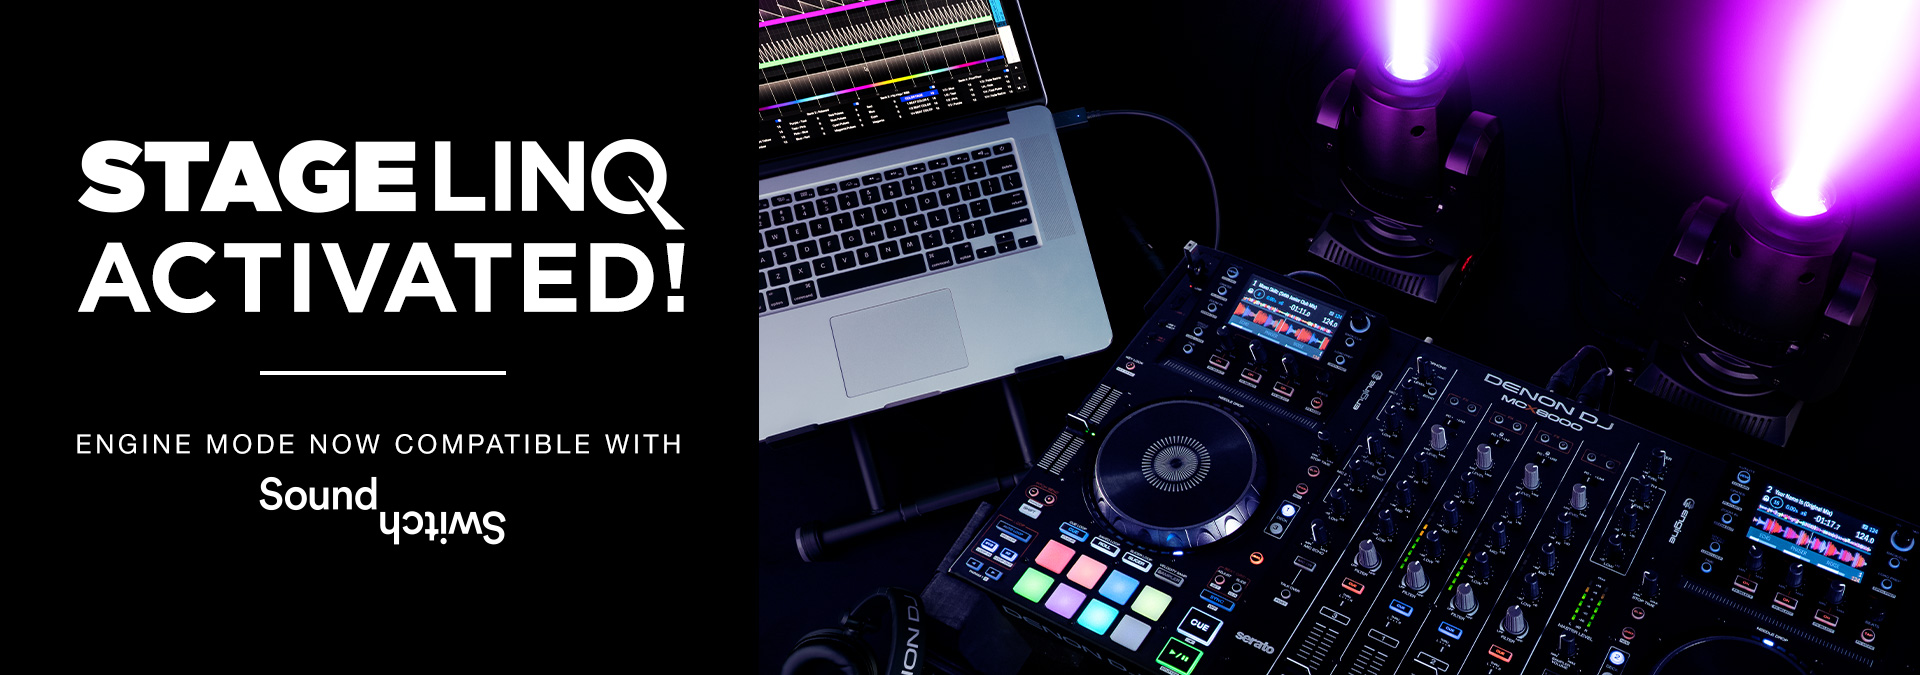
In this ‘How To’ guide, I’ll explain the required hardware and software settings to link SoundSwitch lighting control software with the MCX8000 in standalone mode.
MCX8000 owners receive 2-months of SoundSwitch for free just by registering your product. Log in and register your product to claim this offer today!
Required Hardware
- Denon DJ MCX8000
- Mac or Windows computer to prepare your USB in Engine Prime and run SoundSwitch
- SoundSwitch compatible DMX interface
- DMX capable light fixture(s)
- Ethernet cable to link MCX8000 to the computer
- DMX cable to connect the DMX interface to your light fixture(s)
Connections
- Connect the DMX cable to your SoundSwitch compatible DMX interface.
- Then, connect the other end of your DMX cable to your first light fixture.
- Next, connect the Ethernet cable and SoundSwitch compatible DMX interface to your computer.
- Now, connect the other end of the Ethernet cable to the LINK port on the MCX8000.
- Power on your computer and MCX8000.
Software Setup
-
Open SoundSwitch. Note: SoundSwitch v2.2 or higher is required for MCX8000 compatibility.
-
Click Edit mode and then choose Preferences… from the SoundSwitch toolbar menu.
-
From the General tab ensure both the Engine OS and All-in-One options are selected.
-
Next click the Library tab and ensure Show Engine Prime Library is checked.
-
Once confirmed, click Done to close the Preferences. Note: SoundSwitch will need to be restarted if it was previously set to Serato DJ or Virtual DJ mode.
-
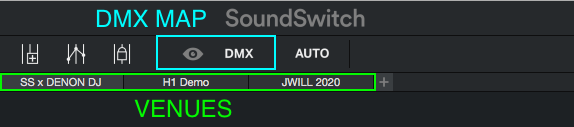
Next, choose your venue and then open the DMX universe map to add and assign your light fixtures.
-
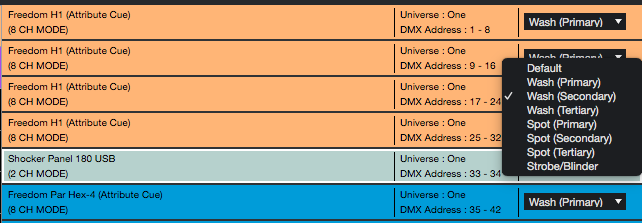
Search for you light by manufacture and model. Once you’ve found your fixture, you can double click or drag and drop directly to the DMX universe map to add it.
Important: Be sure the SoundSwitch assigned DMX channel setting and address match the settings on your light fixtures.
-
You can click the drop down menu within the fixture to assign the light to a different zone or effect.
-
Click Done to close the DMX universe map.
-
From the Music library in the left pane expand the Engine Prime library.
-
Choose a playlist and then select the tracks you wish to create light shows for.
-
From the SoundSwitch toolbar, choose AUTO to autoscript the selected tracks.
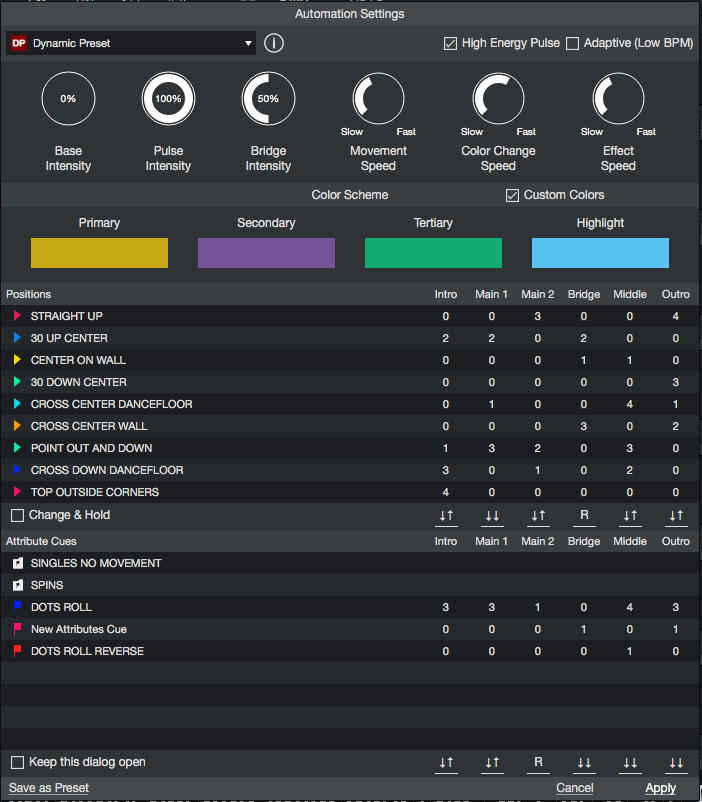
-
Here you can choose AUTO again to let SoundSwitch automatically create a light show or choose Advanced … to select your own preset and dial in your desired settings.
-
Click Apply. Soundswitch will now run the autoscripting process, to detect the different music sections and then create dynamic light shows for all tracks selected.
-
Once complete click Ok.
-
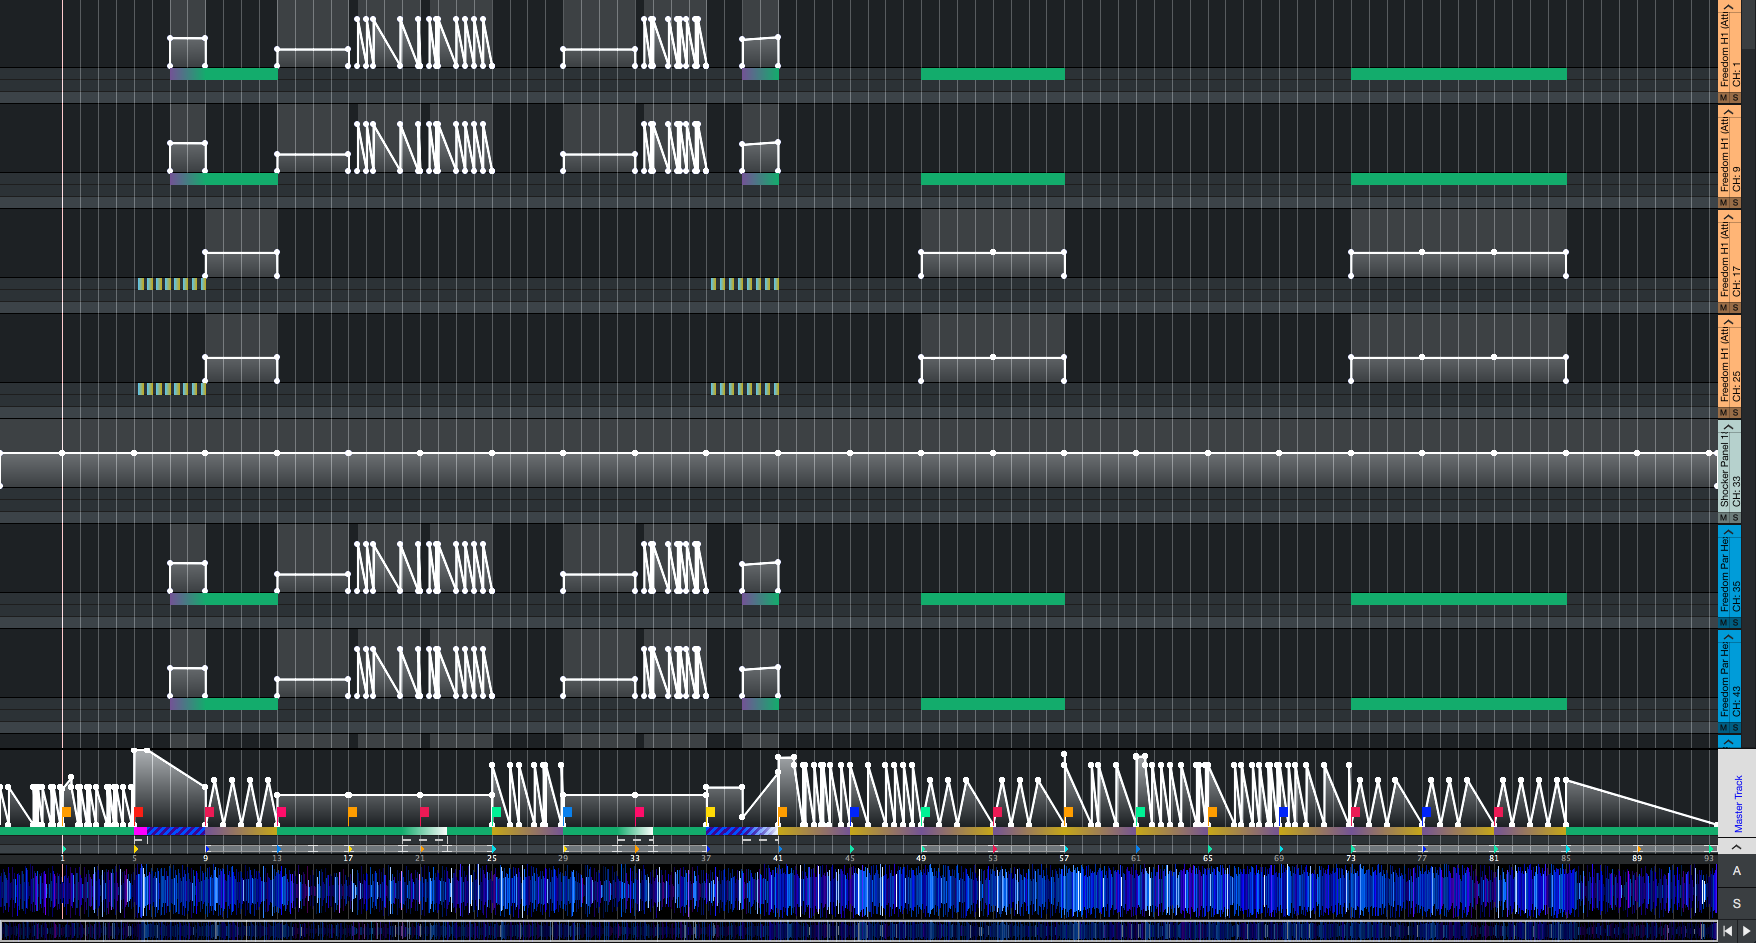
You can now see the lighting automations created for each individual fixture lane.
-
Next, save the autoscripts by clicking the disk icon in the SoundSwitch toolbar.

-
Now open Engine Prime transfer the playlist you just autoscripted to your USB media device. Note: Engine Prime v1.5.1 or higher is required for SoundSwitch compatibility.
Tip: You can also autoscript tracks on the USB media device directly in SoundSwitch but scripting the main Engine Library will allow you to add these files and light shows to different media devices.
-
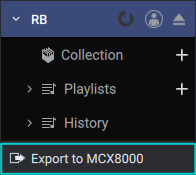
Click Export to MCX8000 button. If you don’t see this button, you’ll need to enable MCX8000 compatibility from the Library tab in the settings.
-
Safely eject your USB media device insert into the MCX8000.
-
In SoundSwitch navigate to File from the top toolbar and choose Switch Mode.
-
Next, choose Perform and choose the venue.
-
Important: Mac users need to disable Wi-Fi in order for the MCX8000 to communicate with SoundSwitch.
-
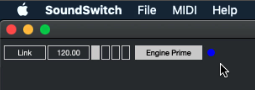
Once you see the blue connection dot here you’re good to go.
-
Load one of the tracks that you just scripted and check out the light show.
Pro Tip: The MCX8000 doubles as a MIDI controller while in standalone mode. This allows you to trigger MIDI functions within SoundSwitch by also connecting the USB cable. For example, you can use deck 3 or 4 to control strobes, intensity, autoloops and more!
If you need a visual reference the Prime 2 walkthrough video is very similar to this process with the exception of exporting your Engine Library for use on the MCX8000.
